ruoyiVue集成JimuBI大屏
本示例以若依Bootstrap单应用版本为例
1、项目结构
=
2、执行初始化脚本
3、pom中引入积木BI大屏最新依赖
默认提供SpringBoot2脚手架项目的依赖,需要springboot3依赖的请查看文档。
注意:使用积木BI大屏需要先集成积木报表依赖。
<!-- 积木报表 -->
<dependency>
    <groupId>org.jeecgframework.jimureport</groupId>
    <artifactId>jimureport-spring-boot-starter</artifactId>
    <version>2.1.1</version>
</dependency>
<!-- mongo、redis和文件数据集支持包,按需引入 -->
<dependency>
  <groupId>org.jeecgframework.jimureport</groupId>
  <artifactId>jimureport-nosql-starter</artifactId>
  <version>2.1.0</version>
</dependency>
<!-- 后台导出接口Echart图表支持包,按需引入 -->
<dependency>
  <groupId>org.jeecgframework.jimureport</groupId>
  <artifactId>jimureport-echarts-starter</artifactId>
  <version>2.3.0</version>
</dependency>
<!--积木BI大屏-->
<dependency>
    <groupId>org.jeecgframework.jimureport</groupId>
    <artifactId>jimubi-spring-boot-starter</artifactId>
    <version>2.1.4</version>
</dependency>
- 最新版本可以从 http://jimureport.com/doc/log 中查询到
4、RuoYiApplication添加积木仪表盘扫描路径
@SpringBootApplication(exclude = { DataSourceAutoConfiguration.class }, scanBasePackages = {"com.ruoyi","org.jeecg"})

5、实现扩展接口
@Service
public class OnlDragExternalServiceImpl implements IOnlDragExternalService {
}
此处很重要,请参考JeecgBoot集成扩展实现:
6、RedisConfig配置类注入jmRedisTemplate
1.9.0及1.9.0以后版本不需要添加此配置类,1.9.0以前版本需要添加此配置类,否则会影响项目正常启动
@Bean("jmRedisTemplate")
public RedisTemplate<String, Object> stringRedisTemplate(RedisConnectionFactory connectionFactory) {
    RedisTemplate<String, Object> redisTemplate = new RedisTemplate<>();
    redisTemplate.setConnectionFactory(connectionFactory);
    FastJson2JsonRedisSerializer<Object> serializer = new FastJson2JsonRedisSerializer<>(Object.class);
    // 使用StringRedisSerializer来序列化和反序列化redis的key值
    redisTemplate.setKeySerializer(new StringRedisSerializer());
    redisTemplate.setValueSerializer(serializer);
    // Hash的key也采用StringRedisSerializer的序列化方式
    redisTemplate.setHashKeySerializer(new StringRedisSerializer());
    redisTemplate.setHashValueSerializer(serializer);
    redisTemplate.afterPropertiesSet();
    return redisTemplate;
}
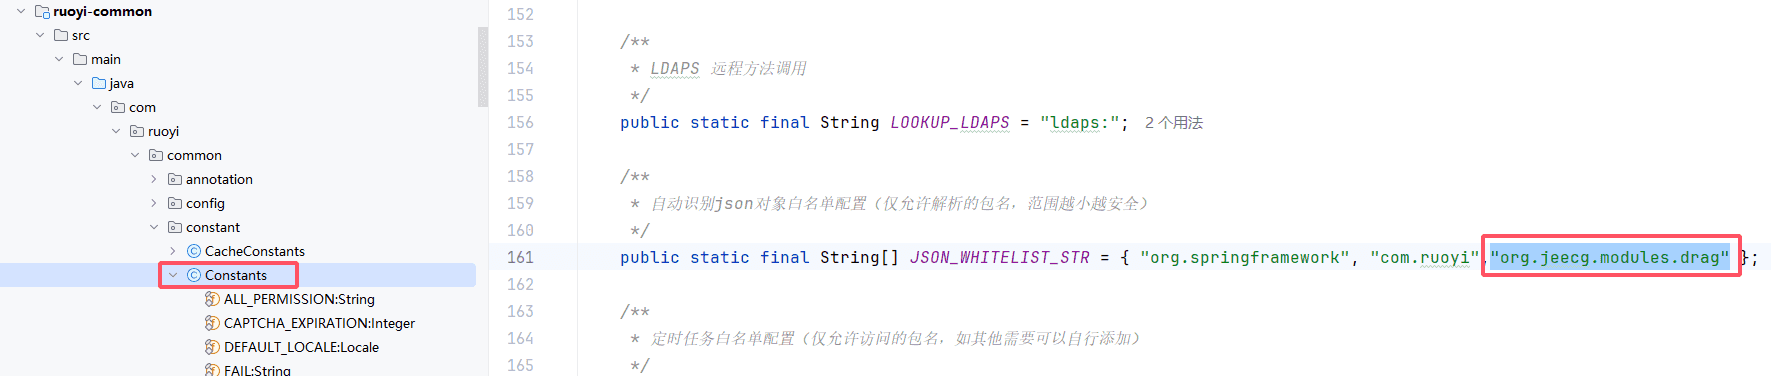
7、配置序列化配置白名单
"org.jeecg.modules.drag"
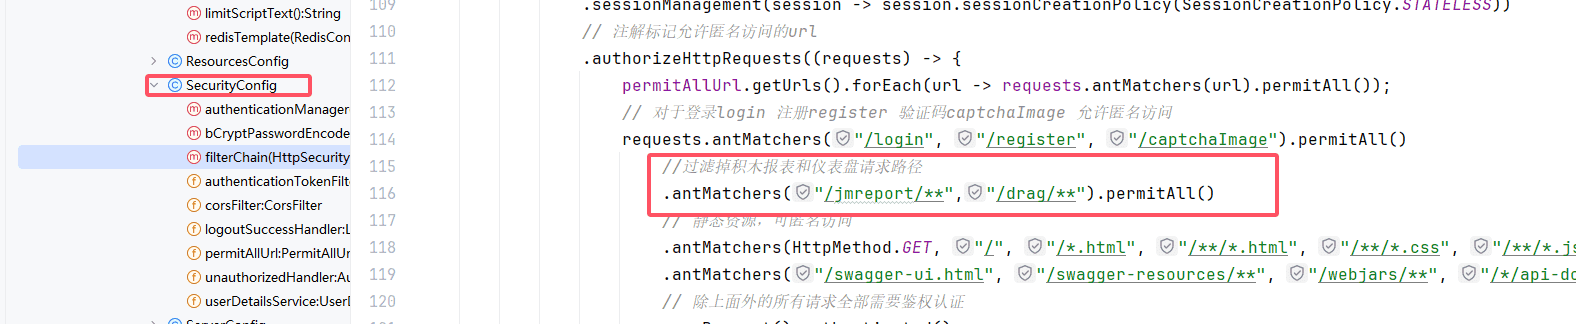
8、SecurityConfig拦截排除
//过滤掉积木报表和仪表盘请求路径
.antMatchers("/jmreport/**","/drag/**","/jimubi/**").permitAll()
9、yml中配置minidao(可忽略)
#持久层框架
minidao:
  base-package: org.jeecg.modules.jmreport.*,org.jeecg.modules.drag.*

10、集成积木权限(操作角色、操作权限)
为了安全积木针对敏感接口,加了角色注解和权限注解,你需要显示的配置角色和权限,才能访问某些功能。
具体对接请仔细阅读文档 集成积木权限
11、启动项目访问
若依默认端口是8080,可以根据自己的需求集成到若依系统里面(如集成到菜单)
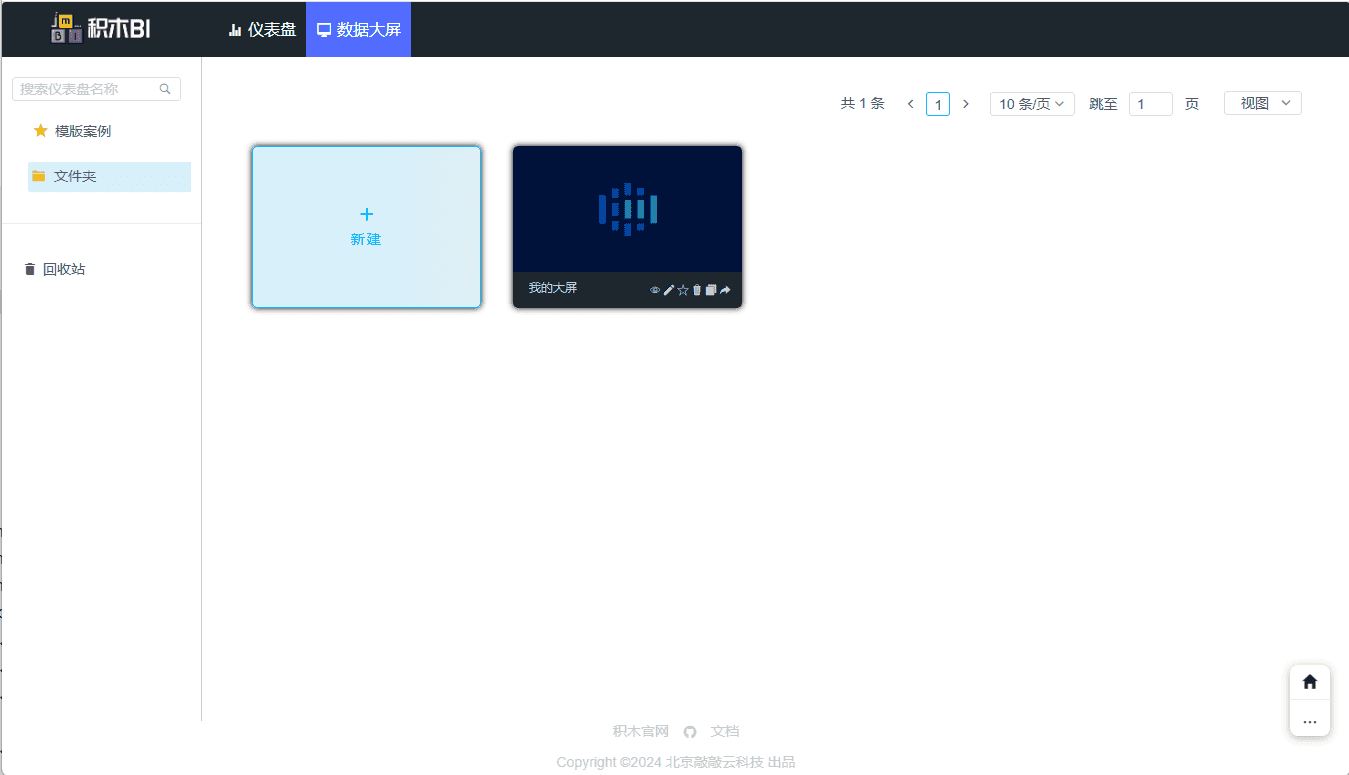
仪表盘访问地址:http://localhost:8080/drag/list
若依访问地址:http://localhost:8080
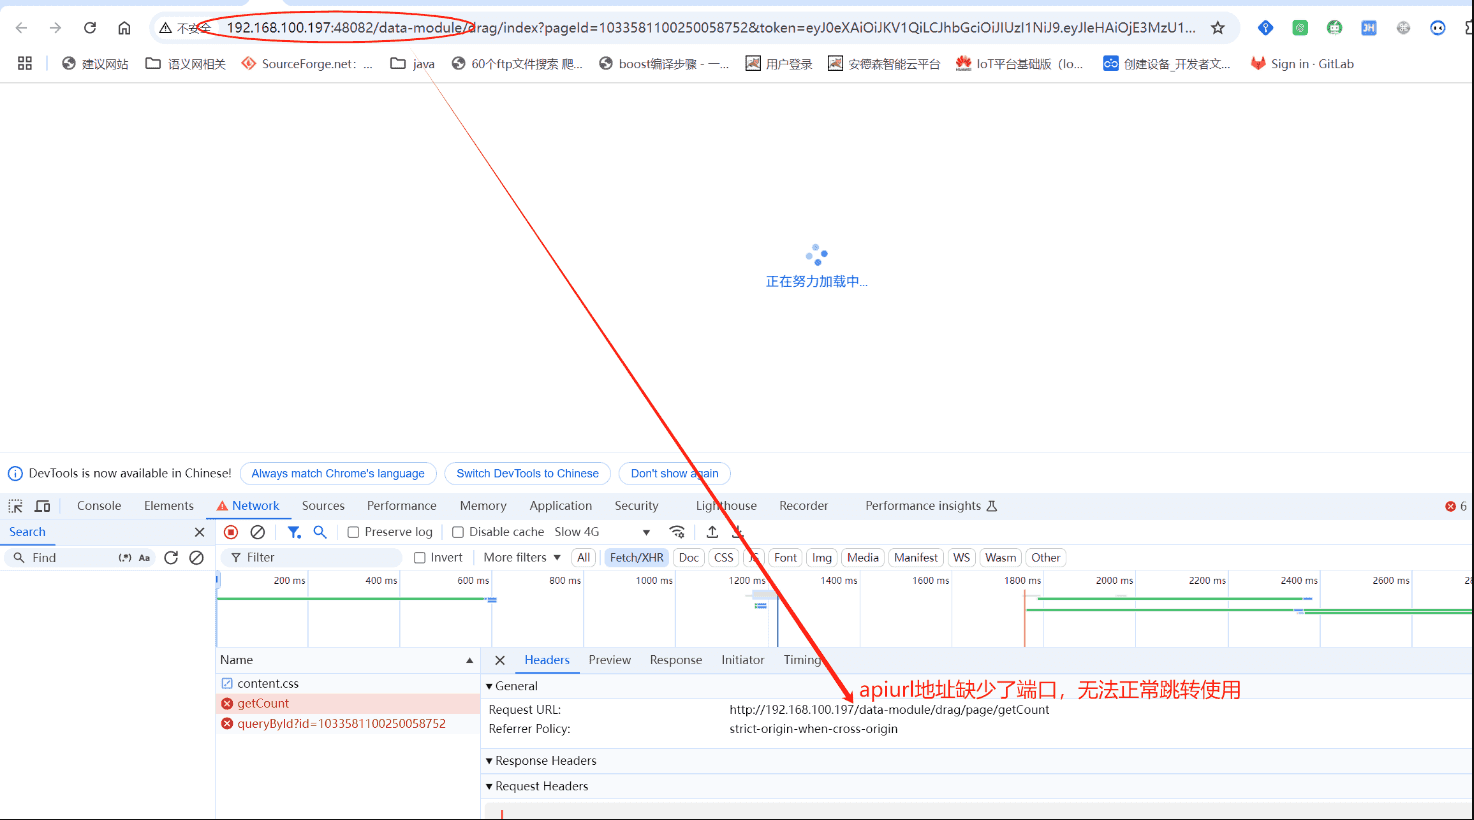
常见问题
1 访问地址连接丢失请求前缀
产生原因之一:nginx转发时访问是有项目前缀,但请求连接上没有拼接,导致项目请求不到地址
- nginx配置

- 访问地址缺少前缀
- 解决方案:pom文件中填写
jeecg :
  jmreport:
    #自定义项目前缀
    customPrePath: